Read our complete grout mixing guide for flawless tile joints. Learn exact water ratios, slake times, and expert tips for strong, color-consistent results. When professionals search for a ‘groutmixing guide’, they are looking for precise, actionable steps to avoid costly callbacks.
Table of Contents
- Key Takeaway
- Grout Mixing Guide in Context
- Introduction
- The Science of Hydration and Ratios
- Mechanical Mixing and the Crucial Slake Time
- Consistency Standards for Walls and Floors
- Avoiding Common Grout Mixing Errors
- Your Most Common Questions
- Comparing Grout Preparation Methods
- Practical Tips for Flawless Joints
- Final Thoughts on Grout Mixing
- Sources & Citations
Key Takeaway

A grout mixing guide is a comprehensive set of instructions detailing the precise water-to-powder ratios, mechanical mixing durations, and slake times required to achieve optimal compressive strength and color consistency in cementitious tile joints.
Grout Mixing Guide in Context
- Cementitious grouts require 3–5 minutes of initial mechanical mixing to achieve a homogenous mixture before slaking (MAPEI Corporation, 2024)[1].
- After the initial mix, cementitious grout should rest, or slake, for about 5 minutes before being re‑mixed (MAPEI Corporation, 2024)[1].
- Grout mixed and then extended with additional water after the initial slake can lose up to 50 percent of its compressive strength (MAPEI Corporation, 2024)[1].
Introduction
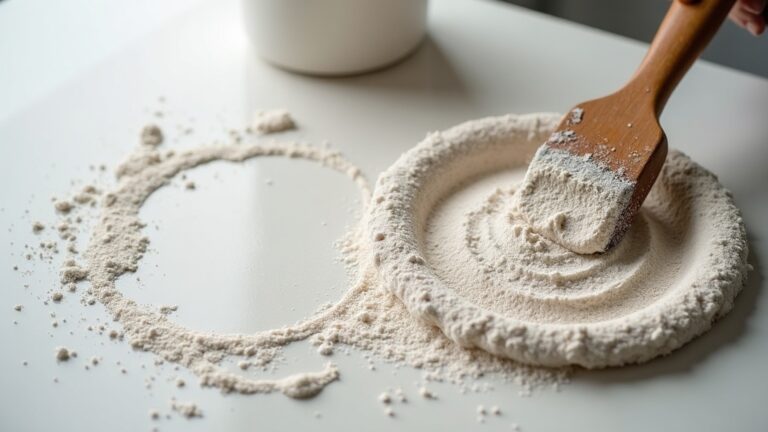
Achieving flawless tile installations begins long before the float touches the substrate. A reliable grout mixing guide is essential for any contractor aiming to produce durable, crack-free joints. When cementitious grout is prepared incorrectly, the resulting tile joints can suffer from severe linear shrinkage, pinholing, and color inconsistency. This article breaks down the critical steps of grout preparation, from measuring the precise water-to-powder ratio to understanding the chemical importance of slake time. Whether you are working with sanded grout for wide joints or unsanded formulations for delicate glass tiles, mastering these foundational techniques ensures long-lasting performance. We will explore mechanical mixing durations, the dangers of re-tempering, and the ideal consistencies for both wall and floor applications. By following these proven grout mixing instructions, you can avoid common failures and achieve professional-grade results.
The Science of Hydration and Ratios
Proper hydration is the foundational chemical process that determines the ultimate compressive strength and durability of cementitious grout. The water-to-powder ratio must be strictly controlled to prevent structural degradation. For example, the recommended powder-to-water ratio for MAPEI Keracolor S cementitious sanded grout is approximately 3 parts powder to 1 part water by weight when mixing a full unit (MAPEI Corporation, 2024)[1]. Deviating from this baseline compromises the matrix. As the MAPEI Technical Services team advises, “Always measure both water and powder carefully and mix only the amount of grout that can be applied within the product’s pot life” (MAPEI Corporation, 2024)[1]. Over-watering is particularly destructive; the NTCA Reference Manual notes that grout mixed with excessive water can experience up to 10 percent linear shrinkage in joints as it cures, increasing the risk of cracking and pinholing (National Tile Contractors Association, 2025)[2]. Even in masonry applications, ASTM C476 limits the maximum water content of cement-lime grout to approximately 10 gallons per cubic yard to control strength and shrinkage (ASTM International, 2024)[7]. For more context on material behaviors, review our uncategorized concrete grout articles to understand how different substrates interact with these mixtures.
Mechanical Mixing and the Crucial Slake Time
Achieving a homogenous mixture requires strict adherence to mechanical mixing durations and mandatory rest periods. MAPEI specifies a mechanical mixing time of 3 to 5 minutes for cementitious grouts to achieve a homogenous mixture before slaking (MAPEI Corporation, 2024)[1]. This initial agitation ensures that all dry particles are thoroughly wetted. Following this, the material must rest. After the initial mix, MAPEI instructs that cementitious grout should rest, or slake, for about 5 minutes before being re-mixed (MAPEI Corporation, 2024)[1]. Other manufacturers, like RUBI Tools, recommend allowing mixed grout to slake for approximately 10 minutes before a brief re-mix and application (RUBI Tools USA, 2025)[6]. This pause is chemically vital. The National Tile Contractors Association Technical Team explains that “Proper grout mixing includes allowing the material to slake and then re‑mixing, which ensures full hydration of the cementitious components and maximizes performance” (National Tile Contractors Association, 2025)[2]. Skipping this step leaves unhydrated pockets that weaken the joint. Once slaked, the grout enters its usable window; properly mixed cementitious grout should typically be workable for 30 to 45 minutes at room temperature before it begins to stiffen (Tile Council of North America, 2024)[8].
Consistency Standards for Walls and Floors
The physical texture of the prepared material must be tailored to the specific orientation and demands of the tile installation. Different surfaces require distinct consistencies to ensure proper workability and adhesion. RUBI describes wall grout consistency as similar to bread dough – strong and thick – while floor grout should be smoother, like peanut butter, to ensure proper workability (RUBI Tools USA, 2025)[6]. This differentiation prevents sagging on vertical planes while allowing easy manipulation on horizontal floors. Bill Palmer, Editor in Chief at Concrete Construction, notes that “Grout should be mixed to a fluid consistency but still cohesive enough that the sand does not segregate or settle out of the mixture” (Informa/ForConstructionPros, 2024)[3]. If the mixture is too wet, James Woelfel warns that “If grout is mixed too loose, you weaken the joints and increase the likelihood of shrinking, cracking, and shading problems as it cures” (Tileletter, 2025)[5]. To achieve these precise textures, MudMixer advises starting with the water-to-powder ratio printed on the grout packaging and then fine-tuning, targeting a peanut-butter-like texture for most tile grout applications (MudMixer, 2024)[6]. For comprehensive industry standards, consult the comprehensive tile installation handbook published by the Tile Council of North America.
Avoiding Common Grout Mixing Errors
Deviating from manufacturer specifications during preparation introduces structural vulnerabilities that compromise the entire tile assembly. One of the most detrimental errors is re-tempering, which involves adding water to a batch that has already begun to stiffen. MAPEI documents that grout mixed and then extended with additional water after the initial slake can lose up to 50 percent of its compressive strength compared with properly mixed grout (MAPEI Corporation, 2024)[1]. This massive reduction in strength leads to premature joint failure. Furthermore, inconsistent mixing directly impacts aesthetics. Ryan Fasan, Technical Consultant for Tile of Spain, emphasizes that “Following the manufacturer’s water‑to‑powder ratio and mixing time is the single most important step for color‑consistent grout on large format tile” (Tile of Spain, 2024)[4]. Variations in water content alter the curing rate, resulting in splotchy, uneven colors across the floor. To avoid these issues, always discard stiffened material rather than attempting to revive it. You can view a sample page of our grouting projects to see how strict adherence to these principles results in flawless, uniform joints across large-scale commercial installations.
Your Most Common Questions
What happens if I add more water to grout after it has slaked?
Adding water after the initial slake period, known as re-tempering, severely compromises the material’s structural integrity. Industry data shows that re-tempered cementitious grout can lose up to 50 percent of its compressive strength. This occurs because the initial hydration process has already begun, and introducing excess water disrupts the chemical bonds forming within the matrix. Over-watered grout is also highly susceptible to linear shrinkage, leading to cracking and pinholing. Always mix only the amount of material you can use within the specified pot life and discard any batch that begins to stiffen.
How long should cementitious grout rest before the final mix?
The resting period, or slake time, is a non-negotiable step in the preparation process. Most manufacturers specify that cementitious grout should rest for about 5 to 10 minutes after the initial mechanical mixing. This crucial pause allows the cementitious components and liquid polymers to fully absorb the water, ensuring complete hydration. Skipping this step results in a weak, uneven mixture that fails to achieve its designed compressive strength. After the designated rest period, the material must be briefly re-mixed without adding any additional water to restore its workable consistency before application.
Why does my grout look different in color across different sections?
Color inconsistency, or shading, is frequently caused by improper water-to-powder ratios or inconsistent mixing times. When preparing large format tile installations, maintaining exact measurements is vital for uniform color. If one batch is mixed with slightly more water, the excess moisture alters the curing process, resulting in lighter or splotchy joints. Failing to allow the material to slake properly or re-tempering old batches will also disrupt pigment distribution. Always use a digital scale for precise measurements and mix full units whenever possible to guarantee a consistent hue throughout the project.
What is the ideal texture for wall grout compared to floor grout?
The ideal texture varies significantly depending on the surface orientation. For vertical wall applications, the material should be mixed to a strong, thick consistency similar to bread dough; this prevents the grout from sagging or falling out of the vertical joints. Conversely, floor grout should be smoother and more pliable, resembling peanut butter, which allows it to be easily forced into horizontal joints using a float. Regardless of the surface, the mixture must remain cohesive enough that the sand does not segregate, ensuring uniform strength across the entire installation.
Comparing Grout Preparation Methods
Selecting the right approach for your grout mixing process depends on the scale of the project and the specific materials used. While hand mixing might suffice for minor repairs, mechanical mixing is universally recommended for professional tile installations to ensure a homogenous blend. The table below contrasts these primary methods.
| Method | Mixing Time | Consistency Control | Best Application |
|---|---|---|---|
| Hand Mixing | 5-7 minutes | Low | Small repairs, unsanded grout |
| Mechanical Mixing | 3-5 minutes | High | Large format tile, sanded grout |
| Pre-Mixed (Acrylic) | 0 minutes | Factory-set | Quick installations, no slake time |
Practical Tips for Flawless Joints
Use a drill with a mixing paddle at low RPM to avoid whipping air into the mixture, which causes pinholing. Always start by adding the powder to the water, not the reverse, to prevent dry clumps from forming at the bottom of the bucket. Keep your tools meticulously clean; dried residue from previous batches can introduce foreign particles that weaken the new mixture and cause color shading. When working in hot or dry environments, the pot life of cementitious grout decreases significantly, so mix smaller batches more frequently. Finally, always consult the specific manufacturer’s technical data sheet, as formulations vary widely between brands. Reviewing a dedicated grout blending manual can help refine your trowel and float techniques for different substrate conditions, ensuring optimal adhesion and a professional finish.
Final Thoughts on Grout Mixing
Mastering the precise techniques outlined in this grout mixing guide is the difference between a fragile, cracked installation and a durable, professional finish. By respecting the chemical requirements of hydration, strictly adhering to slake times, and avoiding the temptation to re-temper, you ensure maximum compressive strength and color consistency. Whether you are tackling a massive commercial project or a simple residential backsplash, these foundational principles remain constant. For more expert insights and detailed tutorials on tile installation, explore the extensive resources available on concretegrout.com to elevate your craftsmanship on every job.
Sources & Citations
- Mixing Partial Units of Grout. MAPEI Corporation.
https://cdnmedia.mapei.com/docs/librariesprovider10/line-technical-documentation-documents/mixing-partial-units-of-grout.pdf - NTCA Reference Manual 2024–2025 – Grout Installation Practices. National Tile Contractors Association.
https://www.tile-assn.com/page/ntca-reference-manual - Grouting: Techniques and Materials for Proper Placement. Informa/ForConstructionPros.
https://www.forconstructionpros.com/concrete/article/55068441/concrete-construction-grouting-techniques-and-materials-for-proper-placement - Best Practices for Grout on Large-Format Tile. Tile of Spain.
https://www.tileofspainusa.com/best-practices-for-grout-on-large-format-tile/ - Avoiding Common Grout Failures in Tile Installations. Tileletter.
https://www.tileletter.com/avoiding-common-grout-failures-in-tile-installations/ - How to Mix Grout. RUBI Tools USA.
https://www.rubi.com/us/blog/how-to-mix-grout/ - ASTM C476 Standard Specification for Grout for Masonry. ASTM International.
https://www.astm.org/c0476-20.html - TCNA Handbook for Ceramic, Glass, and Stone Tile Installation. Tile Council of North America.
https://www.tcnatile.com/products-and-services/publications/tcna-handbook.html
For more about Groutmixing guide, see Groutmixing Guide.